Showing posts with label furniture. Show all posts

Monday, February 4

We've Been Busy!!

Projects. Projects. Projects have been filling most of our weekends. We tackled quite a few since I've been on a nesting kick to get things done before I pop. One such project was our downstairs tv situation. It had become quite a situation...
{the before... all manner of bad.}

We got a tv as a birthday gift a few years ago from my parents. We don't have basic tv but sure enjoy movies and hulu. So, it's been sitting on this small entertainment unit right from the beginning. One of those "temporary solutions that quickly turned permanent" as the years piled on. Enter Theo: our tornado toddler. He would get into the DVDs and fiddle with our player every.single.day. It was getting old. Quickly.

So, W found a great deal on Amazon for a tv wall mount and I hunted craigslist {like it was my part-time job} looking for a dresser that would fit our mini-wall's dimensions without being a road obstacle for foot traffic. Found a dresser, but didn't love its look so I knew immediately when we bought it that I'd be re-doing it. But it had a veneer finish. My quick search online led me to chalk paint.

I'd heard of the stuff but didn't really know much beyond the words "chalk paint" "shabby chic" and "Annie Sloan". So after a mini-lesson {there are a lot of posts out there on it}, I learned about its "chalky" or thicker properties, zero prep-work benefit, and that it adheres to pretty much any surface without hassle. I also learned the price point of AS chalk paint. Yikes! So when I found I {Heart} Naptime's homemade recipe, I figured "why not?" All I had to buy was my normal paint in the colors I wanted + plaster of paris. Easy enough.

4 T Plaster of Paris to 2T HOT water
Mix in container until all the clumps are gone
Mix into 2 cups of paint


At the store, I bought my Plaster of Paris {$6}, my normal gallon of classic white, and then four sample sizes of a paint card I liked: graduating shades of mint. I went with a half batch of chalk paint in each of the five colors because my dresser had so many different colors and not much of each. Worked like a charm.

I did minimal sanding since I didn't really want a distressed look for the dresser. I then covered it in a polyurethane protective coat that we already had on hand. I would love to try the wax finish sometime. Heard it really finishes off the piece nicely. Next time. ;)


We mounted the tv, put the dresser in {after drilling a hole in the back of the top drawer for cords}, and mounted my antler project: ebay antlers + white spray paint + gold craft paint


We are loving the extra storage {currently the bottom two drawers are still empty! So huge for us. ;)}, and the simple fact that T is not creating a mess nor are our movies out for all to see {tacky!!} Definitely one of those "feels so good" projects.

Tuesday, June 14

Big Boy Bed

Last week, W was done with work pretty early so we had some fun putting together a few of the last major components of E's room. One of which being: his bed! I was shying away from it and loving the idea of waiting until the last minute to switch him over, but W was all over it like white on rice. So we dove right in!
I put his comforter, a few pillows and stuffed animals on and sat back to have a "I'm totally a Mama" moment and "He's not a baby anymore" moment as well. E was really excited about it. We played in the room for awhile. He hopped on and off the bed several times. The fabric letters still need a home on the wall but I pulled them out just to see what they would look like.

He did great with the normal bedtime routine--only got up once and W walked and sung him back to bed.  Then he was out for the night. We sneaked back in several times before going to bed, just to check on him and laugh at his various positions. Although he getting older, it still seems like he's too young for a regular bed! Maybe it's because I know two-going-on-three year olds who are still in cribs?! Either way, he still looked so cute and precious!
He did such a great job! I had to put him back a few times in the morning, but he fell back to sleep. And naps were just a smooth. He was so excited in the morning, like he knew that he had done something great. It was really cute. I'm still in shock that my high maintenance babe was so go-with-the-flow. I think he's really chilled out as a toddler! Definitely digging that!

Eek! Final reveal of his entire room coming so soon, I promise. I'm sure ya'll are sick of reading about this redo by now. ;)

Wednesday, May 25

Dresser Reveal {Not Your Grandma's Dresser}

 What we thought would be a bear of a project turned out to be fun! We were going to leave this as the very last thing to do, but when some friends volunteered to helped, we jumped at the chance after E's bookcase.

Here's the before:
This piece was my grandparents. It's in really good shape--we were the ones to put all the scratches and scraps in it. My grandma told me they bought it at an estate sale in 1973 while they were living in Kansas. It was part of a multi-piece set and survived many moves. She grumpily gasped a little when I told her we were paining it yellow. The cherry finish is really nice, just not my style. She relaxed a bit when I said our new color scheme for the master is yellow and gray-- she had a lot of yellow in her house...classy lady, that one!!

And our after:
Now, my favorite piece of furniture we have!

Easter weekend, W was able to get some friends over to help with the hardest part: sanding down the dark finish. What would have taken him several evening hours, ended after 3 hours. It's amazing how far a bribery of beer and fresh deli sandwiches can get ya!

 The dresser: post-sanding
The guys were so quick that we had to call it a day because I hadn't even purchased the paint yet. So we had to let the dresser hang out in the garage. With our entire contents just hanging out in our room. Just lovely.
{This picture is giving my dad a heart-attack right about now.}

I'll spare you the pictures of what it all looked like post-vacation, a few weeks later. Not pretty. E started jumping on our piles like he does when I'm putting the laundry anyway. I knew it was time to get back to working on this sucker when we started collecting baskets of clean clothes on the floor too-- reminds me of my disastrous room in high school...eh. moving on...

After I finally committed to a color, it was back to the rollers again to prime.


Some light sanding and two coats of Behr's Citrus Zest later and we were in dresser business!!

After doing a bit of knob hunting, I realized that I didn't want to pay $5-10 dollars for just one knob when we needed 8. So with a bit of high-gloss white spray paint, we got some updated knob-age. This was my first time using spray paint and let me tell you, I'm hooked. Not so much on the fumes, but on the instant updated look! They were brass before, but looked porcelain/ceramic after a coat of white. Here was my take...
Then W stepped in with this contraption he made...
Seriously, this guy is the quintessential problem solver! Love him!

Well, she's a real beaut in her home. And will be a dandy, {temporary} changing table in a few months when Boy hangs out in our room before moving to his own. Thank goodness for protective coating and chux pads!

Break Down:
Roller, Tray & Brush Set: $11
Quart of paint: $12
Polyurethane Protective Coat: $14
White spray paint: $3
Sandwiches & Beer: $15
Total: $55...but $30 for us with a gift card!

Think Grandma will approve?!?

Tuesday, April 5

Teamwork: Big Boy Bed

W & I finished our very own first piece of furniture together! And I loved loved loved this project for multiple reasons:
1)Learning so much in the process: because I was so interested, I really learned a ton about the size of lumber, power tools, measuring, construction of a simple shape, upholstery, etc.
2) Teamwork: I really love working side by side with W on projects. Call me crazy, but I could totally work with my hubby. Maybe it's because my parents have owned a small business together for as long as I remember so it's just my normal or because I'm all about spending ample time with him. Either way, it was great fun to work together to create something!
3) It's our very own creation: hopefully one that can be used with all of our future kids. W made sure to take extra steps to secure it's longevity and it would be super easy to re-upholster with new fabric. It's so fun to look at the piece while exclaiming: "We did THAT ourselves!!"
4) Ana White's plans are a.mazing: they include every little thing to help a lay-person build...diagrams, measurements of each piece, pictures, shopping list, cut list, instructions--you name it, she wrote about it. Oh, did I mention it's all free?! I was originally hoping to use this for a window seat, but now I'm going to search Ana's blog to see if I can find plans to match...and saved some moolah!

And so, here it is:

Yup, I completely tossed out the light blue idea and went with an indigo/navy color after finding the perfect duvet fabric. Our local JoAnn's had some pretty slim pickings because it's moving to a bigger store, but I got a sweet discount--I was only a few dollars under my budget but I bought 4 yards instead of the 2 the plans called for because my fabric was 45'', not 60''. I also found some cute light blue stripe fabric that I'll use for pillows. I'm so excited to start making his linens now. We're on the fence about whether to purchase another crib mattress or just buy some foam--I've got to do some price comparison before deciding.

I also painted the legs of the bed with some of our trim paint used in the house. Hoping that will tie the bed into his new room more. When we do his cubby shelf, I hope to also paint it the same color {Snippet of Tannin; Kelly-Moore}

We also haven't decided when to actually try this sucker out. Heh. But we're both thinking early/mid-summer, maybe after we get back from Pennsylvania.

Break-down...
Lumber/Supplies: about $30
Fabric: about $24
Foam {used instead of batting, a trick I learned on another blog}: $15
Total: roughly $70

Not bad for a new upholstered toddler bed...just the way I wanted it!

Monday, April 4

The Poll Is Closed

So the gender poll on the left-sided tool bar is officially closed! Hoot hoot! Looks like the majority are voting girl this time around. Last time, majority voted boy and were absolutely correct. As my mother always pipes, "Time will tell!" with this one. 

In fact, time will tell us TOMORROW! That's right, W & I are headed into the bladder torture test tomorrow afternoon during his lunch break. 

Here's our silly/fun game plan:
Go into ultrasound with index card with very short quiz for the technician...
Have technician seal answers in envelope. Pick E up from my parents. Give them the sacred envelope. Parents go out shopping for uber cute gender-specific outfit. Wrap that sucker up. Bring wrapped gift to our house just in time for us to head out to dinner and they put E down for the night. We have a delicious meal {yet to be decided, but I'm voting sushi} and open exciting gift while they're curled up on our sofa watching a movie...with my dad most likely fast asleep, snoring.
Perfect, yeah?

In other sibling news: we are ALMOST done with E's big boy bed. It would have been finished last night but we ran out of staples after upholstering the headboard. So the side-panels will have to wait for tonight. We've been chipping away at it a few hours a night...hence the limited posts last week. I normally throw together thoughtfully write my posts at night after E's in the bed. But here's a sneak peak to wet the ol' palette until tomorrow {hopefully!!}
It's been such a fun project to do with W & I've learned a ton!! More on that later...

Saturday, September 25

Wish List

So many yummy things in the new Serena & Lily catalog!

Here are a few I'd love to see in our house...

{but with an "S"}

a new bed 

and a pair of new chairs for our sitting area!

Monday, June 28

Area Rugs

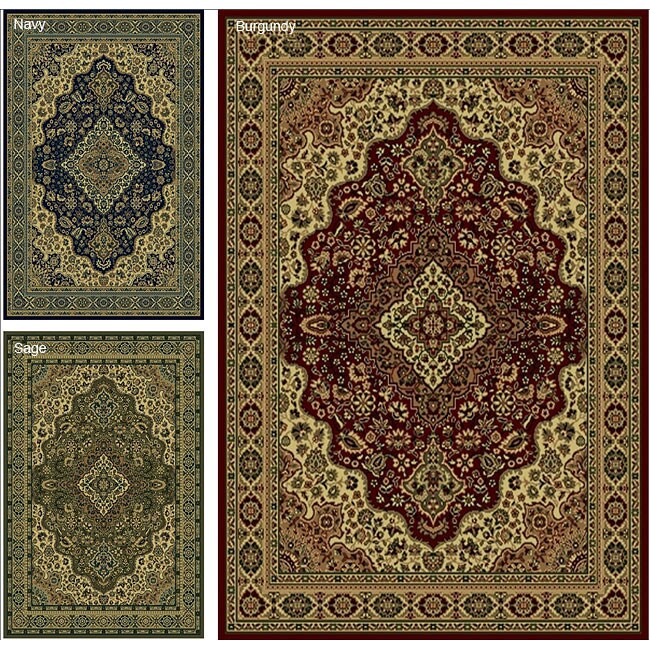
 Our downstairs space is something I've been itching to re-do. The decor is still lovable but I just want to change a few things up. One being the area rug. The current one is fun and colorful, reminding me of one of my favorite artists. We have his "Mother and Child" print in Ezra's room. My parents gave us our current rug when they moved into their remodeled home & we were thrilled. It's surviving the high traffic area but I'm not sure for how much longer. I've always really liked it, but I'm ready for something new. Here are a few I've been eyeing...
{Either the Burgundy or Sage one.}


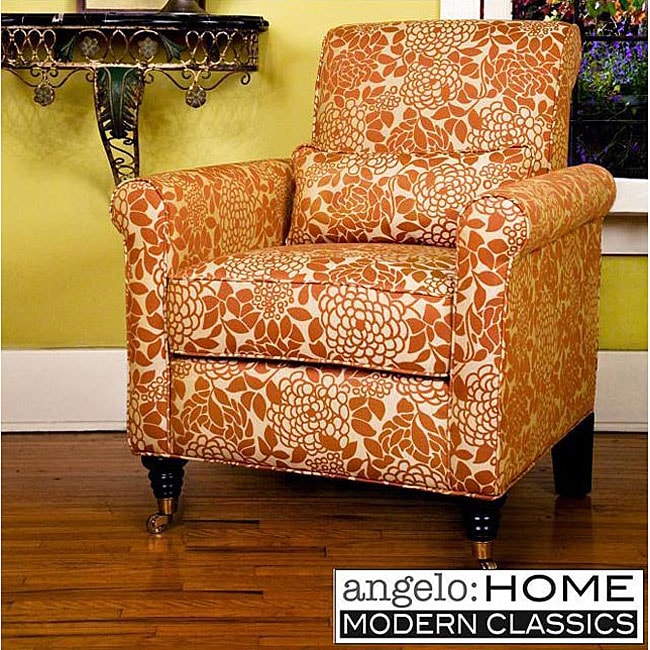
Total side note: I'm in love with this chair!
My favorite store, Anthro, was carrying it awhile back, but I found it online for a cheaper price while looking for rugs!

Sunday, April 25

Throw Back to the 50s


Our friend, J Moog, came over yesterday to work on his 50s style diner booth that we're storing in our garage for him. While he was away getting supplies, I took a few shots with Ezra since he was all matchy-matchie in his pjs!

Saturday, April 24

And He's Done!!

My wonderful & patient husband is finally finished with his our DIY project for storage in Ezra's room!! I'm so proud of all his hard work & attention to detail! :) Who knew spray painting actually requires some skill & patience?! A few summers ago, we found an old locker with really great potential abandoned along the street we live off of. And since the sign shouted "FREE" in capital letters {Us, Swensons favorite price}, we couldn't pass it up. And so it sat, and sat, and sat in our garage.

{Finished sanding & starting to spray paint}
 
Fast forward to end of our pregnancy and we still need a bookshelf or something to fit in the baby's room...the locker! How perfect! So we bought some spray paint, sanding supplies, stencils, and safety wear. The thing had old hornet's nests & cobwebs in it! W & a friend of his worked on it multiple days for long hours. My contribution? Supper after they were finished for the day. :)
{Making the ugly old inside pretty with paint!}

W & a couple of strong guys moved it up to Ezra's room several weeks ago. I added a few dollar store magnets I bought when I was pregnant {I still consider myself a non-practicing teacher} W nailed it to some straps that are connected to the wall for safety. And voila! It's done!! What a fun way for Ezra to store his toys & books! Perhaps make clean-up more exciting?!? Now if I could just convince him to make an upholstered headboard for our bed and help me turn old paint cans into flower pots... :)

{The front. Barely passed the husband "boyish enough" 
inspection with some of these stencils.}

{Sorry, Ez. The only E was hot pink.
And #13 is what we referred to him as in the womb. He's Grandbaby Swenson #13.}

{the inside}

Wednesday, July 9

Need Bedroom Furniture?

Well, actually not "need" per-say since we have William's 8 year old Ikea bed but I'd definitely love a grown-up look to go with the rest of our romantic bedroom (the wood between the worlds as William refers to it). I have never owned my own furniture. When we got married, I was gifted my grandma's which I love so much. It's so vintage & comfy. Add in a few extra things from my parents & you've got our townhouse. Post-college, I lived on an air mattress until finally making it back to my parent's bedding then marriage & sharing with William. So needless to say, I'm so thankful that we haven't had to purchase anything ourselves so far. Such a blessing! Nonetheless, I was looking online & came across a fabulous place for beds. I totally fell for these:


I'm currently working on, scratch that, discussing the first one with William. Take away that jeweled pillow & it's less feminine. Making it perfect for us! :)

Here's the site: http://www.bedroom-furniture-direct.com/