Tuesday, April 19

He Survived!

Last night, W's firm celebrated the end of another tax season with a wine tasting event for their clients. So that means W officially survived his first tax season as an accountant! He helped serve food and wine to the clients...

The apps and desserts were to-die-for.
My parents, who have known these people for longer than we have {when you're in the same business in the same small town, you rub shoulders often}, showed up early on then came over to watch E while I attended the second half of the party. I even pulled out some heels for this special occasion! Hoot hoot!

So proud of my hard-working hubby
So now that his stint is over, he'll head back to BT {as a chauffeur} and study for the CPA exam for the next five months before his permanent job {auditor} at a larger firm begins! We've been so thankful for this season with an awesome and thoroughly fun staff. And for all that W was able to learn in such a short and stressful time. Onto new adventures!

Friday, April 15

Another Simple Recipe

Tried out another Real Simple recipe this week. Super easy and super yummy. Seriously, like 10 minutes of prep time with very minimal clean-up. I turned this side into a meal for dinner..


Roasted Potatoes & Lemon with Dill
What you need:
2 lbs of red potatoes, quartered
1 lemon, thinly sliced 
2 T olive oil
3/4 t salt
1/4 t pepper
2T coarsely chopped fresh dill

What you do:
Heat oven to 450 degrees. In bake-able container, toss potatoes, lemon, oil, salt and pepper.
Roast, tossing once, until tender, 25-35 minutes.
Toss with the dill before serving.

{I added 4 chicken breasts seasoned with lemon pepper to the container and cooked for about 45 minutes to an hour.}


Super easy, huh? Had hardly any clean up because I just tossed the container in the fridge with the leftovers. Perfect!! Definitely going into our rotation.

Thursday, April 14

Boy Names

Oi Vey. Trying to come up with another one we love is proving to be hard work, even though we already know the gender! Then again, W& I's styles are pretty different so when we finally agree, there's no second guessing or hesitation.

 I can't say I have a number one yet, like I did last time {Wyatt}. But we didn't go with that name anyway, so really, who cares?! W jokes that we should put a focus group together to pick a name. Yeah right, then we'd do the exact opposite. I'm about 100% positive that we wouldn't be fully inspired until we actually get to meet the little tyke. There's just something about that moment when you are all face-to-face for the first time.

Here is what's on our list this week {in no particular} order...

Asher {happy/blessed}
Thor/Thorsten {W's grandpa's name}
Connor/Constantine
Theo/Theophilus {lover of God}
Desmond
Rowan
Wade
Amos

Hopefully, we can whittle it down to our favorite top three by his birthday. Only 20 more weeks until we all found out together what this little guy's name is going to be!!

Wednesday, April 13

This Stage

Don't get me wrong, I love love love the sweet newborn stage, but I am LOVING this stage that E is in. Sure, the discipline/training has already started. We have to think and be proactive, but it's still a blast. E will be 16 months this weekend {the 17th}.

He's been walking for many months, can feed himself, uses the potty for #2 very consistently and is quite independent. But at the same time, completely dependent, says few words, still holds my hand, needs lots of cuddles when waking up or after getting an owie, likes to know where I'm at, and is entertained by the simplest things. And it's just SO FUN to see all the new things he's learning while interacting and exploring.

He's such a hoot even though so messy!


And he's still such a peanut,
 But sometimes, seems so big.
He loves practicing imitation and beams with pride when he gets to take part in it.
And is just such.a.ham.

He very much into body parts and knows: head, knee, toes, mouth, eyes, ears, nose, heart {we say, "boom, boom! while he pats its location after pointing it out.} and belly button. He has this thing for belly buttons right now--and not just his own. This includes even Grandpa's, so I've been told. It's great because it gives us a chance to talk about baby brother, say hi to him, kiss and snuggle him in Mama's belly.

E's also saying some words--mostly repeating them after us. He says: car, walk, dog, hot, cold, "kaw kaw" for birds,  "baah baah" for sheep, out, up, and ball. He'll smell a flower if you give him one. And is obsessed with bikes, buses, trucks, leaf blowers, dogs, birds, squirrels, books, sticks, dirt, slides, throwing, walking the dogs, and climbing on anything possible.

This is my new favorite. Being a parent just keeps getting better!

I'll take 4 more, please... ;)

Tuesday, April 12

Easy Peasy Envelope Throw Tutorial

Someone has new bedding!!
After a fun trip to Ikea this weekend for a crib comforter {among many other items purchased!}, I turned a twin duvet into an E sized one. Both fabrics above I found at an antique thrift store! They were perfect for the colors I wanted in his room. The fabric I used for the pillows was only $2 for a whole bundle. And I have a good amount left over.

The blue striped fabric seriously smelled like my grandma's house, in a good way, when I ironed it. It was kinda crazy because it's been years since that house was occupied by her. Brought back memories of toast with homemade frozen apricot jam and yummy french fries in the deep fryer..but I digress. The two pillow covers I made with an envelope style.
 {the back...I poked it out a little so you could see the overlapping flaps.}

There are many many envelope throw tutorials out in blogland. It is one of the quickest and easiest projects to update any room so I thought I'd share what I found while making E's two for his bed. Depending on your pillow form {the pillow that goes inside}, this project should only take a yard or less per pillow cover.

First, the slip cover is basically made up of three pieces. The front and two overlapping backs. My pillow forms measured 21 x 21. So I cut my front fabric about 22 x 22. The back two pieces should overlap so I cut 22 x 16 and 22 x 13.  You can eyeball this by laying the pieces on top of each other...5-7 inches of overlap is ideal.
Next, iron the 'flap' edge on each side of both back pieces and sew them in place. This will give a finished look to the two sides that will make the envelope opening.

Then sew the two back pieces to your front piece, right sides together {which basically means, the front side of your fabric should be facing/touching the other front side}. So now you should have one long piece of fabric.

The last step sewing steps: sew the top and bottom of the pillow square. Make sure your shorter back piece is on the outside with the longer back piece underneath it. And pin the two back pieces to the front so you make sure to sew a straight line and include both pieces while finishing the pillow square.

Turn your cover right side out & stuff that pillow inside!! Then admire your handy work! I bet you could even embellish it with felt flowers or ruffles. But since these are for a big boy room, I had to abstain.

{Some of the tutorials that I used and found helpful are here and here.}

Monday, April 11

Thursday, April 7

List of Future Projects

W may or may not now call me a DIYN..."do it yourself nutter." I can definitely see how this can be quite addicting. ;) Ever since finding Ana White's free plans, I'm a bookmarking mad-lady. I'm thinking we could shoot for a big project per month and still get some things done before this baby BOY joins us. EEK! :)

I was talking to my mom about this recently. In all seriousness, I haven't really cared all that much about what went into our house, until now, as along as it was warm, welcoming, and tidy for guests.. I mean, we were really fortunate that so many lovely pieces came from my grandma and parents during their respected moves {assisted living and the re-modeled grandparents' house} to decorate our house, but I didn't really know what I was doing or what my style was. My mom made a good point that now that I'm spending much more of my time at home, I care more about adding more personal touches to it. Now, if only I could harness that motivation for clean, clean, cleaning...oi!

Anyway, here's what DIY projects I've got on my list so far {not counting painting our & E's room}...

1) Definitely the next project, especially since we can re-use most supplies from E's bed project.

We'll pass on the legs and lay it horizontally instead against the window for a window seat/reading area. I'll make a seat cushion, throw pillows and buy some baskets for storage.

2) A friend just re-did a piece of furniture using this amazingly awesome color. I'm hooked and want to update our dresser with it now....in Behr's Lemon Lime
Her beauty--

Our potential--


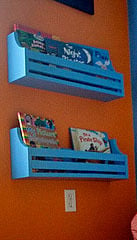
3) Bookshelves
It's a toss up between these and another style that I've been eyeing for E's big boy room.

4) Update table lamps with spray paint & fabric
I don't know if I could get away with this much girlie-ness but this is my inspiration
It may end up looking similar to this, just different colors/fabric

5) New headboard: I've been talking about wanting a new bed for like 3 years now. I found this great tute on making your own headboard and thought it was a decent start and much more manageable on the budget.
 But, potentially with this fabric...to go with the whole yellow and charcoal theme I'm leaning towards for our master. W thinks this has too much potential for getting dirty, but it's SO cute!

 ... And way down the road when I start thinking about our downstairs...

or
I have to perfect spot for this or this and would really love some hidden storage for E's toys.

...I wonder if they have an DIYA {do it yourself anonymous} group?!...Heh.

Wednesday, April 6

It's A...

Our technician was super sweet and played along with our little game. Said it made his day and he couldn't wait to tell the Misses about the idea. Ha! 
We headed out to a delicious sushi meal with a bag of goodies from my parents.
They were so sweet to get a little swim outfit for both E and his baby brother. :) So weird saying that. It's just so crazy to know already before he's even here. We enjoyed being the only ones to know during dinner and when we got home, texted the masses {family and friends} so they could be on the fun too. We're jokingly saying that we should go into the 'groom-making' business for all our friends with adorably cute and awesome girls.

Here are some of our favorite responses...
"yay yay YAY for another boy!!!! I think Ezra is one lucky little man! And you, too, who will one day be made much of by THREE men!!! :)"

"Oh yeah. I'm thinking, between you, me & Tim--that we gonna have an army of boys. Congratulations, man."

"Really?? I'm so surprised!!! Well I have loads of girl clothes for when she comes along. I think Ezra will be such a great big bro and let's face it, every boy needs a brother. Someone to wrestle with. ;)"

"Sweet. More potential grooms for Autumn to chose from. Congratulation, Papa!"


"Nothing wrong with two boys...until they're teenagers. Just kidding. Love ya."


"Omg!!! I'm so excited for you! It really is true that every pregnancy is so different. Crazy!! Yahoo! So excited for you guys. E is going to be the best big brother!"


"OMG!! CONGRATS!! Yay for Swenson Testosterone!! Yay for Swenson Brothers!!"


"Haha!! I knew it!! :) You're an awesome boy Mama and your boys will be close buddies, which I think is so great!!!! Love it!!!! :)"

We are definitely excited for the future bond that E and this little guy will have. As well as, getting to build up strong, God-fearing men to protect, provide and serve their future families!! What an amazing job we have ahead of us. Phew.
Now comes the next hardest part....deciding on some good solid names that we both love.

Tuesday, April 5

Teamwork: Big Boy Bed

W & I finished our very own first piece of furniture together! And I loved loved loved this project for multiple reasons:
1)Learning so much in the process: because I was so interested, I really learned a ton about the size of lumber, power tools, measuring, construction of a simple shape, upholstery, etc.
2) Teamwork: I really love working side by side with W on projects. Call me crazy, but I could totally work with my hubby. Maybe it's because my parents have owned a small business together for as long as I remember so it's just my normal or because I'm all about spending ample time with him. Either way, it was great fun to work together to create something!
3) It's our very own creation: hopefully one that can be used with all of our future kids. W made sure to take extra steps to secure it's longevity and it would be super easy to re-upholster with new fabric. It's so fun to look at the piece while exclaiming: "We did THAT ourselves!!"
4) Ana White's plans are a.mazing: they include every little thing to help a lay-person build...diagrams, measurements of each piece, pictures, shopping list, cut list, instructions--you name it, she wrote about it. Oh, did I mention it's all free?! I was originally hoping to use this for a window seat, but now I'm going to search Ana's blog to see if I can find plans to match...and saved some moolah!

And so, here it is:

Yup, I completely tossed out the light blue idea and went with an indigo/navy color after finding the perfect duvet fabric. Our local JoAnn's had some pretty slim pickings because it's moving to a bigger store, but I got a sweet discount--I was only a few dollars under my budget but I bought 4 yards instead of the 2 the plans called for because my fabric was 45'', not 60''. I also found some cute light blue stripe fabric that I'll use for pillows. I'm so excited to start making his linens now. We're on the fence about whether to purchase another crib mattress or just buy some foam--I've got to do some price comparison before deciding.

I also painted the legs of the bed with some of our trim paint used in the house. Hoping that will tie the bed into his new room more. When we do his cubby shelf, I hope to also paint it the same color {Snippet of Tannin; Kelly-Moore}

We also haven't decided when to actually try this sucker out. Heh. But we're both thinking early/mid-summer, maybe after we get back from Pennsylvania.

Break-down...
Lumber/Supplies: about $30
Fabric: about $24
Foam {used instead of batting, a trick I learned on another blog}: $15
Total: roughly $70

Not bad for a new upholstered toddler bed...just the way I wanted it!

Monday, April 4

The Poll Is Closed

So the gender poll on the left-sided tool bar is officially closed! Hoot hoot! Looks like the majority are voting girl this time around. Last time, majority voted boy and were absolutely correct. As my mother always pipes, "Time will tell!" with this one. 

In fact, time will tell us TOMORROW! That's right, W & I are headed into the bladder torture test tomorrow afternoon during his lunch break. 

Here's our silly/fun game plan:
Go into ultrasound with index card with very short quiz for the technician...
Have technician seal answers in envelope. Pick E up from my parents. Give them the sacred envelope. Parents go out shopping for uber cute gender-specific outfit. Wrap that sucker up. Bring wrapped gift to our house just in time for us to head out to dinner and they put E down for the night. We have a delicious meal {yet to be decided, but I'm voting sushi} and open exciting gift while they're curled up on our sofa watching a movie...with my dad most likely fast asleep, snoring.
Perfect, yeah?

In other sibling news: we are ALMOST done with E's big boy bed. It would have been finished last night but we ran out of staples after upholstering the headboard. So the side-panels will have to wait for tonight. We've been chipping away at it a few hours a night...hence the limited posts last week. I normally throw together thoughtfully write my posts at night after E's in the bed. But here's a sneak peak to wet the ol' palette until tomorrow {hopefully!!}
It's been such a fun project to do with W & I've learned a ton!! More on that later...